自動ステージをPythonで制御する方法についてシェアしたいと思います。
PythonでThorlabs Inc.の自動ステージを制御する方法について書かれている記事は探してもありませんでした。
ですので、自分で書こうと思い、試行錯誤して得たノウハウのエッセンスを記事にしています。
今回使う自動ステージはThorlabas Inc.のステージです。このステージは同社顕微鏡に組み込むことができます。
自作顕微鏡は拡張性があるため、自由度が広がります。計測と解析を一元化することで、アナログな顕微鏡観察を自動化し、
多変量データ解析をシームレスに導入できるでしょう。
Thorlabs自動ステージ挙動
開発環境
– Windows10 (x64)
– Python3.6
– Anaconda3
– MSL-Equipment
使用する機材
– 小型ステッピングモーター ZFS25B(Thorlabs Inc.)
– ステッピングモーターコントローラKST101(Thorlabs Inc.)
– コントローラーハブ KCH301(Thorlabs Inc.)
インストール
Thorlabs Inc.自動ステージを動かすためには以下の2つが必要です。
こちらからkinesisをインストールします。
kinesisは、ローカルPC環境に合わせてバージョンを選んでください。GUIベースのアプリケーションがついてきますが、
今回は使わず`Thorlabs.MotionControl.KCube.StepperMotor.dll`が以下のディレクトリに保存されていれば問題ありません。
C:/Program Files/Thorlabs/Kinesis
今回は、Windows10のx64なので、Kinesis 64-Bit Software for 64-Bit Windowsを選択します。
インストール中
完了。
Thorlabas自動ステージを制御するためのモジュールMSL-Equipmentをインストールします。
このライブラリはニュージーランドの研究機関Measurement Standards Laboratory of New Zealandが無償で公開しています。
まず、以下のコマンドをコピペして実行しましょう。
pip install https://github.com/MSLNZ/msl-equipment/archive/master.zip
例えば、次のようにAnaconda promptなどで実行してみましょう。
インストールが完了しました。準備完了ですね。
インストール手順(原文)
https://msl-equipment.readthedocs.io/en/latest/install.html
動作確認
サンプルプログラムは以下のディレクトリから`kst101.py`を探します。
C:\Users\あなたのユーザーネーム\anaconda3\Lib\site-packages\msl\examples\equipment\resources\thorlabs
下のプログラムをコピペしてもいいでしょう。
さて、サンプルプログラムを眺めてみます。
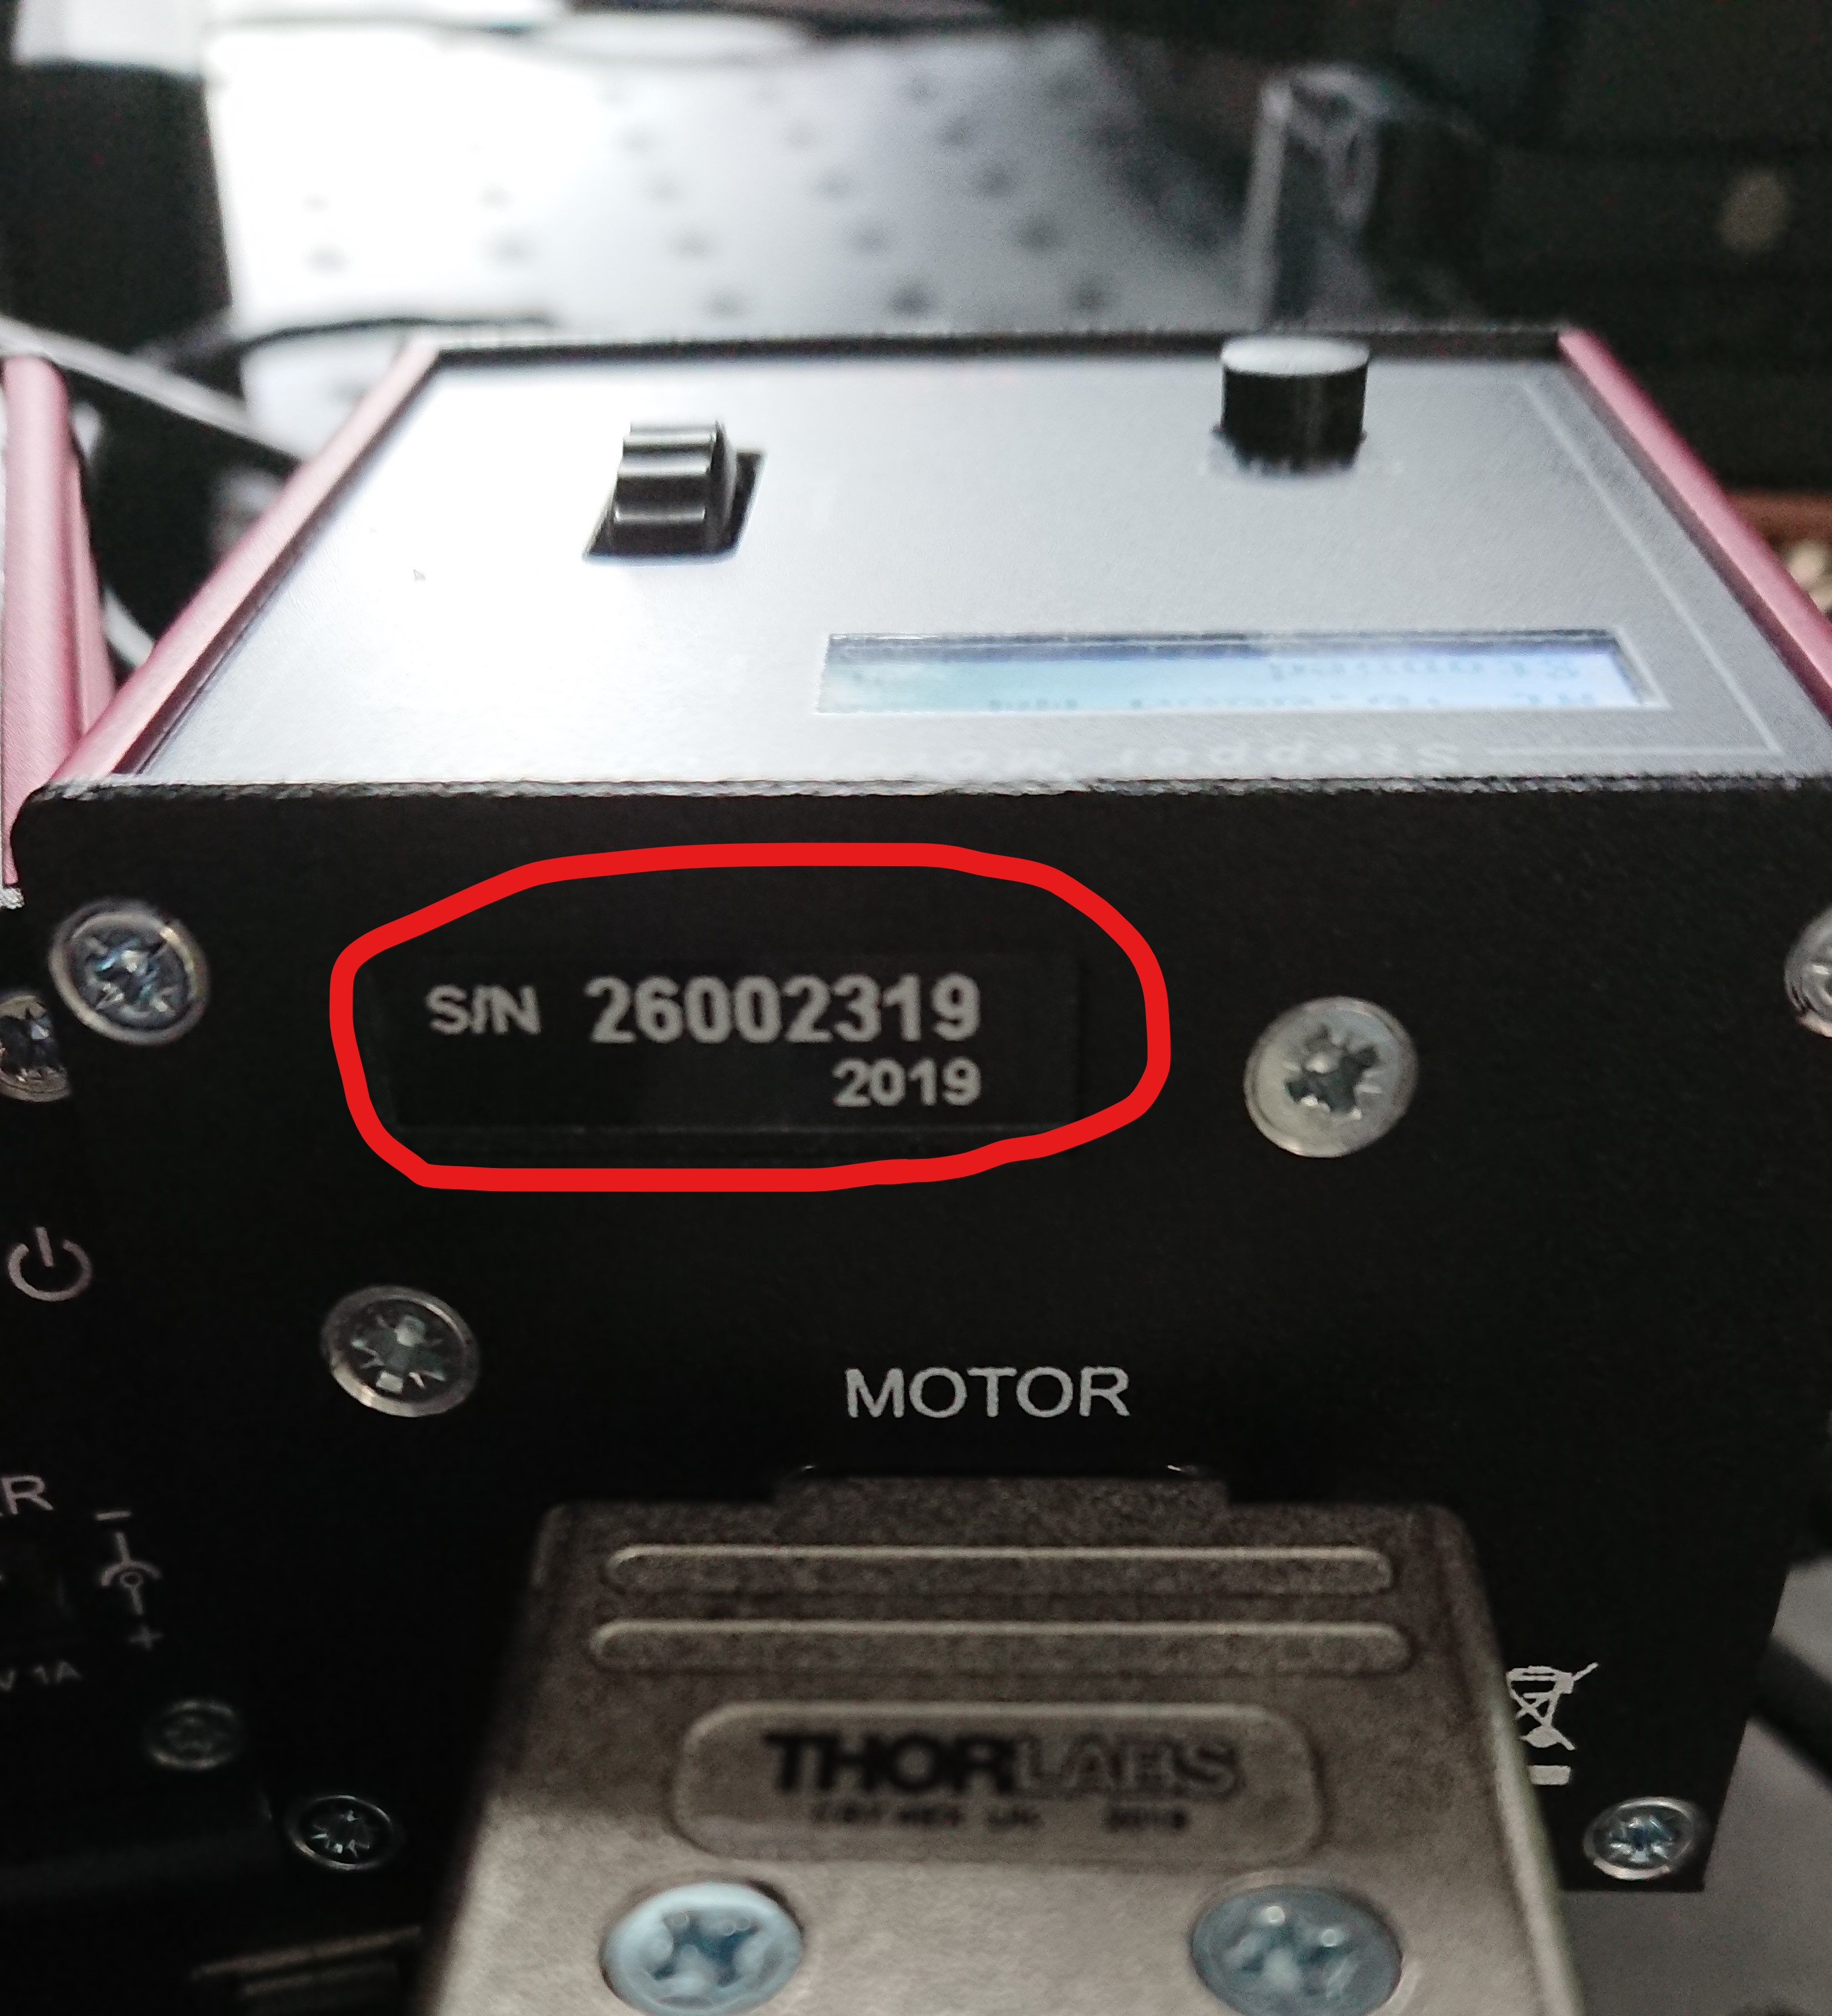
serial=’26001809′の部分を自分が使っているデバイスのシリアル番号に変えるだけで動きそうですね。
“`kst101.py
“””
This example shows how to communicate with Thorlabs KST101, KCube Stepper Motor.
“””
# this “if” statement is used so that Sphinx does not execute this script when the docs are being built
if __name__ == ‘__main__’:
import os
from pprint import pprint
from msl.equipment import EquipmentRecord, ConnectionRecord, Backend
# ensure that the Kinesis folder is available on PATH
os.environ[‘PATH’] += os.pathsep + ‘C:/Program Files/Thorlabs/Kinesis’
# rather than reading the EquipmentRecord from a database we can create it manually
record = EquipmentRecord(
manufacturer=’Thorlabs’,
model=’KST101′,
serial=’26001809′, # update the serial number for your KST101
connection=ConnectionRecord(
backend=Backend.MSL,
address=’SDK::Thorlabs.MotionControl.KCube.StepperMotor.dll’,
),
)
def wait(value):
motor.clear_message_queue()
message_type, message_id, _ = motor.wait_for_message()
while message_type != 2 or message_id != value:
position = motor.get_position()
real = motor.get_real_value_from_device_unit(position, ‘DISTANCE’)
print(‘ at position {} [device units] {} [real-world units]’.format(position, real))
message_type, message_id, _ = motor.wait_for_message()
# connect to the KCube Stepper Motor
motor = record.connect()
print(‘Connected to {}’.format(motor))
# load the configuration settings (so that we can use the get_real_value_from_device_unit() method)
motor.load_settings()
# start polling at 200 ms
motor.start_polling(200)
# home the device
print(‘Homing…’)
motor.home()
wait(0)
print(‘Homing done. At position {} [device units]’.format(motor.get_position()))
# move to position 100000
print(‘Moving to 100000…’)
motor.move_to_position(100000)
wait(1)
print(‘Moving done. At position {} [device units]’.format(motor.get_position()))
# move by a relative amount of -5000
print(‘Moving by -5000…’)
motor.move_relative(-5000)
wait(1)
print(‘Moving done. At position {} [device units]’.format(motor.get_position()))
# jog forwards
print(‘Jogging forwards by {} [device units]’.format(motor.get_jog_step_size()))
motor.move_jog(‘Forwards’)
wait(1)
print(‘Jogging done. At position {} [device units]’.format(motor.get_position()))
# stop polling and close the connection
motor.stop_polling()
motor.disconnect()
# you can access the default settings for the motor to pass to the set_*() methods
print(‘\nThe default motor settings are:’)
pprint(motor.settings)
kst101の背面に8桁のシリアル番号がありました。

上のプログラムのserial=’26001809′をserial=’26002319′に変更します。
プログラムを実行して動作したら完成です。
その他ご不明点についてのお問合せは、下記フォームよりお気軽にご連絡ください。
http://www.opto-line.co.jp/contact/
